You know that moment when you want dessert faster than your willpower can say “no”? This is that dessert. No peeling, no cutting, no complicated steps—just three ingredients and one pan.
It tastes like you spent your Sunday baking with grandma, but you actually spent eight minutes assembling and the rest smelling like a genius. Your friends will ask for the recipe; you’ll smirk and pretend it’s “complicated.” Spoiler: it’s not.
Why You’ll Love This Recipe
- It’s absurdly easy: Three ingredients. One pan.
Nearly zero cleanup.
- Foolproof flavor: Apple pie filling, buttery topping, and a crispy finish—classic, cozy, and wildly satisfying.
- Budget-friendly: Everything comes from the pantry or a quick grocery run. No fancy tools required.
- Quick turnaround: From “I’m craving dessert” to “wow, this is good” in under 40 minutes.
- Scales up effortlessly: Feeding two or twelve? Double it, triple it, live your best crisp life.
Ingredients Breakdown
- 2 cans (20–21 oz each) apple pie filling: The star.
Choose a brand you trust. If it’s extra syrupy, we’ll adjust the topping slightly.
- 1 box (approx. 15–18 oz) yellow cake mix: Dry. Not prepared.
This is your shortcut crumble that bakes up golden and crisp.
- 1/2 cup (1 stick) unsalted butter, melted: For richness and a toasty top. Salted butter works too; just a touch more savory.
Optional boosters (highly recommended):
- 1 teaspoon ground cinnamon or apple pie spice for warmth.
- 1/2 teaspoon vanilla extract stirred into the filling for extra bakery vibes.
- Pinch of salt in the topping to balance the sweetness.
- 1/2 cup chopped nuts (pecans or walnuts) for crunch, if you’re into that.
Let’s Get Cooking – Instructions
- Preheat and prep: Heat your oven to 350°F (175°C). Grease a 9×13-inch baking dish or a similar casserole pan.
- Spread the filling: Empty the apple pie filling into the dish.
If using vanilla or extra cinnamon, stir it directly into the filling. Spread evenly.
- Add the cake mix: Sprinkle the dry yellow cake mix evenly over the apples. Don’t stir.
Keep it level for an even bake.
- Butter it up: Drizzle the melted butter evenly across the surface. Aim to moisten as much cake mix as possible. Any dry patches?
Lightly tap with a spoon to help it absorb.
- Optional toppings: Sprinkle cinnamon, a pinch of salt, or chopped nuts over the top.
- Bake: Place on the center rack and bake 30–40 minutes, until the top is deeply golden and crisp and the edges are bubbling. If spots look floury midway, drizzle a tablespoon or two more melted butter.
- Rest: Cool 10–15 minutes so it sets slightly. This also keeps your mouth from lava-level regret.
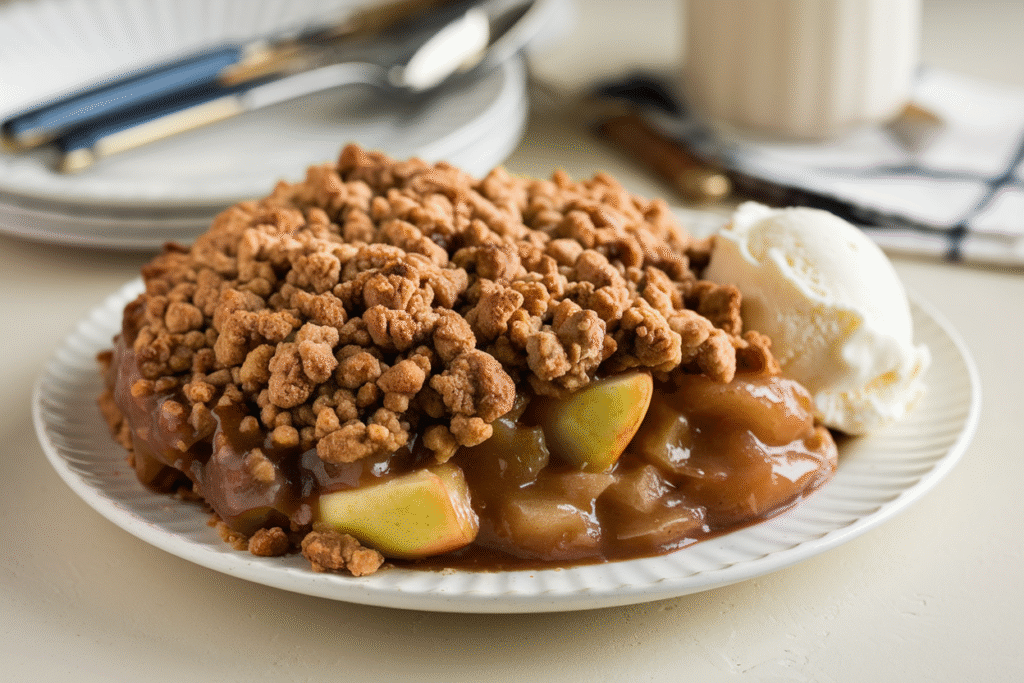
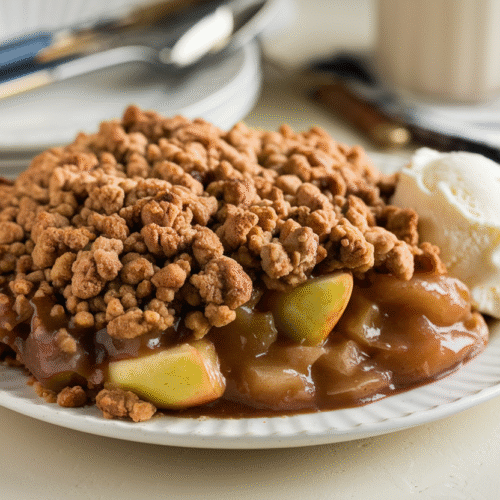
- Serve: Scoop into bowls.
Add vanilla ice cream, whipped cream, or a drizzle of caramel if you’re feeling dramatic (you should).
Preservation Guide
- Room temperature: Keep loosely covered for up to 6 hours if your kitchen is cool. Beyond that, refrigerate.
- Refrigerator: Store covered for 3–4 days. The topping will soften, but flavor stays great.
- Reheat: Warm portions in the oven at 350°F for 10–12 minutes to re-crisp, or microwave 30–60 seconds for speed (crisp factor: meh, but still tasty).
- Freezer: Freeze tightly wrapped for up to 2 months.
Thaw in the fridge overnight and reheat at 350°F for 15–20 minutes.
What’s Great About This
- Zero culinary flex required: You’ll look like a pro without actually…you know…being one.
- Consistent results: The cake-mix-and-butter combo delivers a dependable crumble every time.
- Customizable: Spice it up, add nuts, switch fruit—your kitchen, your rules.
- Comfort in a bowl: Warm apples, crisp top, melty ice cream. If cozy had a flavor, this would be it.
Avoid These Mistakes
- Dumping without distributing: Uneven cake mix leads to powdery patches. Spread it evenly before buttering.
- Not enough fat: The crisp needs adequate butter to brown.
If your box is on the large side (18 oz), bump butter to 3/4 cup.
- Soupy filling: Extra-wet pie filling can make the bottom soggy. If yours looks runny, add 1–2 tablespoons of quick oats or crushed graham crackers over the apples before the cake mix.
- Overbaking: Burnt equals bitter. Pull it when it’s golden-brown with bubbling edges, not dark brown all over.
- Cutting too soon: Let it sit at least 10 minutes.
Hot sugar is not your friend, and the texture improves.
Recipe Variations
- Caramel Apple Crisp: Drizzle 1/4 cup caramel sauce over the apple filling before adding the cake mix. Finish with a pinch of flaky salt.
- Maple Pecan Crunch: Mix 1/2 cup chopped pecans into the dry cake mix and drizzle 2 tablespoons maple syrup over the top before baking.
- Oatmeal Streusel Mashup: Stir 1/2 cup quick oats and 2 tablespoons brown sugar into the cake mix for extra texture.
- Cinnamon Roll Vibes: Use spice cake mix instead of yellow. Add a quick icing drizzle (powdered sugar + milk) after baking.
IMO, dangerously good.
- Gluten-Free Swap: Use a gluten-free yellow cake mix. Everything else stays the same.
- Mini Mugs: Divide filling and topping into oven-safe ramekins. Bake 18–22 minutes.
Portion control… theoretically.
- Fruit Flip: Sub apple pie filling with cherry, peach, or blueberry. Same method, new personality.
FAQ
Can I make this in a slow cooker?
Yes. Add the apple pie filling to a greased slow cooker, top with cake mix and melted butter, and cook on High for 2–2.5 hours.
The top won’t get as crisp as the oven, but it’s set-it-and-forget-it easy.
What if I only have one can of pie filling?
Use one can in an 8×8-inch pan and reduce the cake mix to about 2/3 of the box. Keep butter at roughly 6 tablespoons. Baking time may be 5 minutes shorter.
Can I reduce the sweetness?
Use a “no sugar added” apple pie filling, and add a pinch of salt and extra cinnamon.
You can also swap yellow cake mix for a vanilla or spice mix that’s less sweet, or sprinkle chopped nuts to add balance.
Do I need to stir the cake mix into the apples?
No. Keep layers separate. The butter hydrates the cake mix from the top while the bubbling apples steam from below, creating that crisp-meets-crumb texture.
Why is my topping powdery after baking?
Dry spots usually mean uneven butter coverage.
Spoon on another tablespoon or two of melted butter and bake for 5 more minutes. Also, check that you spread the mix evenly before baking.
How do I know it’s done?
Look for a deep golden top with bubbling around the edges. If the center is pale, give it 5 more minutes.
Your kitchen will smell like a cinnamon candle factory—good sign.
Can I use oil instead of butter?
Technically yes, but you’ll lose the buttery flavor and some crispness. If you must, use a neutral oil and add a pinch of salt. Butter is the move here, FYI.
Is this the same as a dump cake?
Pretty much.
This leans “apple dump cake meets crisp.” It behaves like a crisp with a cake-mix crumb top—minimal effort, maximal payoff.
What’s the best way to serve it?
Warm, with vanilla ice cream. Whipped cream works, but ice cream creates that hot-cold contrast that makes your brain do a happy dance.
Can I add fresh apples?
Yes. Thinly slice 1–2 apples and mix into the pie filling for extra texture.
If they’re very tart, add 1–2 teaspoons sugar. Bake as directed.
Final Thoughts
This Easy 3 Ingredient Apple Crisp With Pie Filling is the dessert equivalent of a mic drop: quick to make, big on flavor, and shockingly reliable. It’s perfect for last-minute guests, lazy weeknights, or when you simply want something warm and cozy without the hassle.
Keep the trio—pie filling, cake mix, butter—on standby and you’re always 40 minutes away from applause. Your oven does the work. You take the credit.
Fair deal, right?
Easy 3 Ingredient Apple Crisp
Ingredients
Main Ingredients
- 2 cans apple pie filling (20–21 oz each) Choose a brand you trust. If it’s extra syrupy, we’ll adjust the topping slightly.
- 1 box yellow cake mix (approx. 15–18 oz) Dry. Not prepared.
- 1/2 cup unsalted butter, melted Salted butter works too; just a touch more savory.
Optional Boosters
- 1 teaspoon ground cinnamon or apple pie spice For warmth.
- 1/2 teaspoon vanilla extract Stirred into the filling for extra bakery vibes.
- 1/2 cup chopped nuts (pecans or walnuts) For crunch, if you’re into that.
- pinch none salt In the topping to balance the sweetness.
Instructions
Preparation
- Preheat your oven to 350°F (175°C). Grease a 9x13-inch baking dish or a similar casserole pan.
- Empty the apple pie filling into the dish. If using vanilla or extra cinnamon, stir it directly into the filling. Spread evenly.
- Sprinkle the dry yellow cake mix evenly over the apples. Don’t stir. Keep it level for an even bake.
- Drizzle the melted butter evenly across the surface. Aim to moisten as much cake mix as possible.
- Optionally, sprinkle cinnamon, a pinch of salt, or chopped nuts over the top.
Baking
- Place on the center rack and bake for 30–40 minutes, until the top is deeply golden and crisp and the edges are bubbling.
- If spots look floury midway, drizzle a tablespoon or two more melted butter.
Serving
- Cool for 10–15 minutes so it sets slightly.
- Serve with vanilla ice cream, whipped cream, or a drizzle of caramel.
Notes
Printable Recipe Card
Want just the essential recipe details without scrolling through the article? Get our printable recipe card with just the ingredients and instructions.