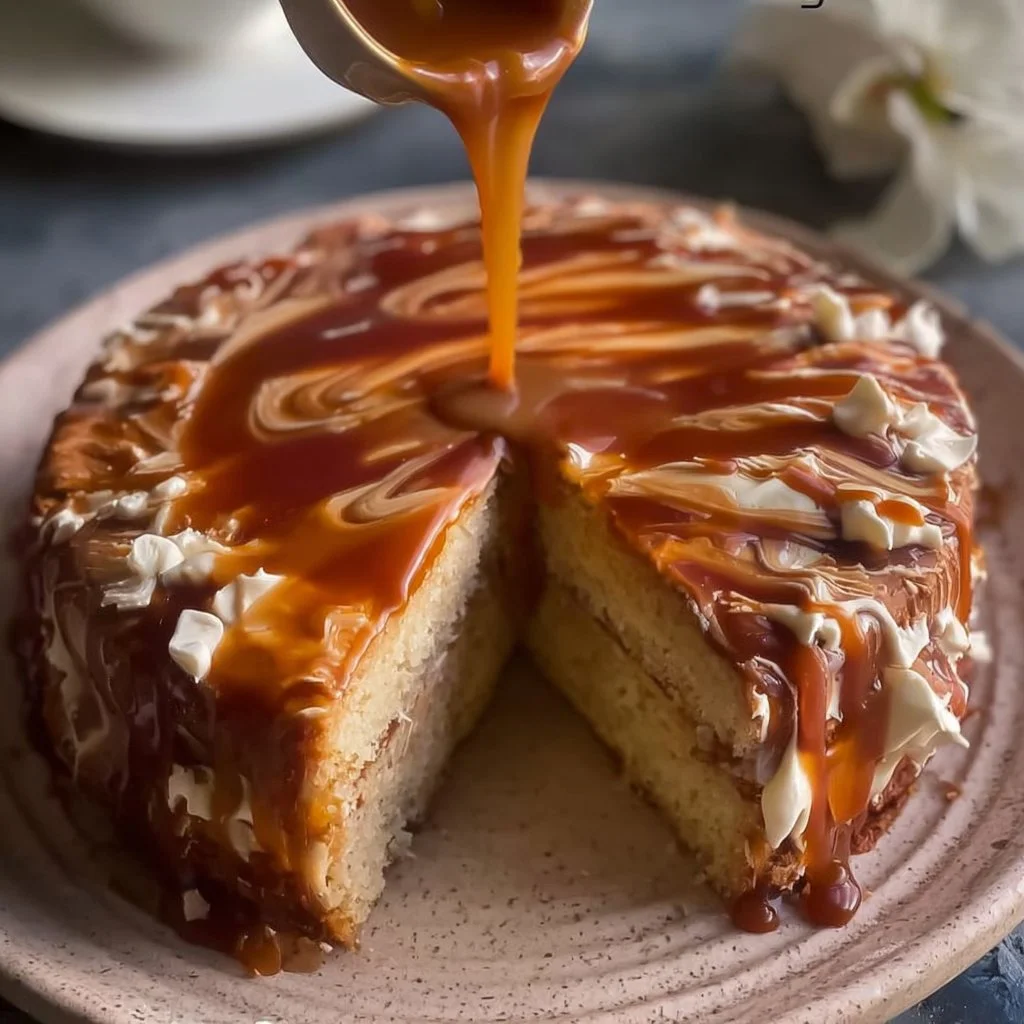
There’s Nothing Quite Like a Slice of Salted Caramel Cake
Imagine sinking your fork into a moist, fluffy cake drizzled with rich salted caramel, each bite offering satisfying layers of sweetness and a hint of saltiness. If you’re drooling already, you’re not alone! This Salted Caramel Cake is the ultimate dessert experience, perfect for gatherings or just a treat-yourself moment. It’s easy to whip up and even easier to get lost in those luscious flavors.
Why Make This Recipe
You know what’s better than cake? Cake that’s simple to make and scrumptious to eat! Here’s why you’ll fall in love with this Salted Caramel Cake:
- Easy Cleanup: You can whip this beauty up in just one bowl (plus a couple of cake pans, but who’s counting?).
- Family Favorite: Everyone from kids to grandparents craves that sweet-salty combo. You might want to hide a slice or two!
- Impressive Yet Unfussy: It looks gorgeous on the table, but trust me, you won’t need a culinary degree to pull it off.
Ingredients
You don’t need fancy stuff — just these basics!
- 2 cups all-purpose flour
- 1 ½ cups granulated sugar
- ½ cup unsalted butter, softened
- 1 cup whole milk
- 3 large eggs
- 2 ½ teaspoons baking powder
- 1 teaspoon vanilla extract
- ½ teaspoon salt
- 1 cup homemade salted caramel sauce
- 1 cup caramel buttercream frosting
Directions
This is how easy it is to create your own salted caramel masterpiece:
- Preheat your oven to 350°F (175°C) and grease and flour two 9-inch round cake pans.
- In a large mixing bowl, cream the butter and sugar until light and fluffy.
- Add eggs one at a time, mixing well after each addition.
- Stir in the vanilla extract.
- In another bowl, combine flour, baking powder, and salt.
- Gradually add the dry ingredients to the wet mixture, alternating with milk until combined.
- Divide the batter evenly between the prepared cake pans.
- Bake for 25-30 minutes, or until a toothpick comes out clean.
- Allow cakes to cool in the pans for 10 minutes before transferring to a wire rack to cool completely.
- Once cooled, layer the cakes with caramel buttercream and drizzle salted caramel sauce between layers and on top.
- Serve and enjoy your delicious Salted Caramel Cake!
How to Make Salted Caramel Cake (Overview)
Getting your hands on this heavenly cake is simpler than you think! Start by mixing that delightful butter and sugar until fluffy; it’s like a little hug in a bowl. Then, beat in your eggs and vanilla — small victories, right? Combine your dry ingredients, and voilà! Mix it all up, and before you know it, you’re on your way to baking bliss.
Pro Tip: Don’t rush the cooling process. Letting the cakes cool completely prevents that sad, soggy mess when layering.
How to Serve Salted Caramel Cake
Presentation is key when indulging in this decadent treat! Serve slices on colorful dessert plates, drizzling extra salted caramel over the top for a luxe touch. Pair it with a scoop of vanilla ice cream or a dollop of whipped cream to elevate the experience. The aroma of caramel wafts through the room, and the golden layers glisten invitingly—seriously, who can resist?
How to Store Salted Caramel Cake
Leftovers, if any, can be stored in the fridge for up to 4 days. Just keep that cake in an airtight container to protect it from drying out. Want to keep it longer? You can freeze the cake for up to three months, but make sure to wrap it tightly. Thaw in the fridge overnight and enjoy!
Tips to Make Salted Caramel Cake
Here are a few tips to kick your baking skills up a notch:
- Room Temperature Ingredients: Bring your butter, eggs, and milk to room temp for a better rise and texture.
- Milk Swap: If you want a richer flavor, use half-and-half instead of whole milk.
- Salt Level: Adjust the amount of salt in your caramel according to your palate — be bold or keep it subtle!
Variation
Feeling adventurous? Consider adding a layer of chocolate ganache between the cake layers for a decadent twist. Or go vegan by swapping in plant-based butter, almond milk, and flax eggs. Use a vegan caramel sauce, and you’ll have a crowd-pleasing dessert that everyone can enjoy!
FAQs
1. Can I use cake mix instead of making it from scratch?
Absolutely! Just follow the mix instructions and add some salted caramel into the batter for flavor.
2. How can I make the caramel sauce ahead of time?
You can make homemade salted caramel up to a week before! Just store in the fridge and reheat before using.
3. What can I do with leftover Salted Caramel Cake?
Turn leftover cake into a luxurious trifle by layering with whipped cream and fresh fruits!
📌 Pin this recipe for your next cozy dinner night!

Salted Caramel Cake
Ingredients
Cake Ingredients
- 2 cups all-purpose flour
- 1.5 cups granulated sugar for sweetness
- 0.5 cups unsalted butter, softened
- 1 cup whole milk or half-and-half for a richer flavor
- 3 large eggs at room temperature
- 2.5 teaspoons baking powder
- 1 teaspoon vanilla extract
- 0.5 teaspoon salt adjust to taste based on caramel level
- 1 cup homemade salted caramel sauce for filling and topping
- 1 cup caramel buttercream frosting for layering
Instructions
Preparation
- Preheat your oven to 350°F (175°C) and grease and flour two 9-inch round cake pans.
- In a large mixing bowl, cream the butter and sugar until light and fluffy.
- Add eggs one at a time, mixing well after each addition.
- Stir in the vanilla extract.
Mixing Dry Ingredients
- In another bowl, combine flour, baking powder, and salt.
- Gradually add the dry ingredients to the wet mixture, alternating with milk until combined.
Baking
- Divide the batter evenly between the prepared cake pans.
- Bake for 25-30 minutes, or until a toothpick comes out clean.
- Allow cakes to cool in the pans for 10 minutes before transferring to a wire rack to cool completely.
Assembly
- Once cooled, layer the cakes with caramel buttercream and drizzle salted caramel sauce between layers and on top.
- Serve and enjoy your delicious Salted Caramel Cake!
Notes
Printable Recipe Card
Want just the essential recipe details without scrolling through the article? Get our printable recipe card with just the ingredients and instructions.