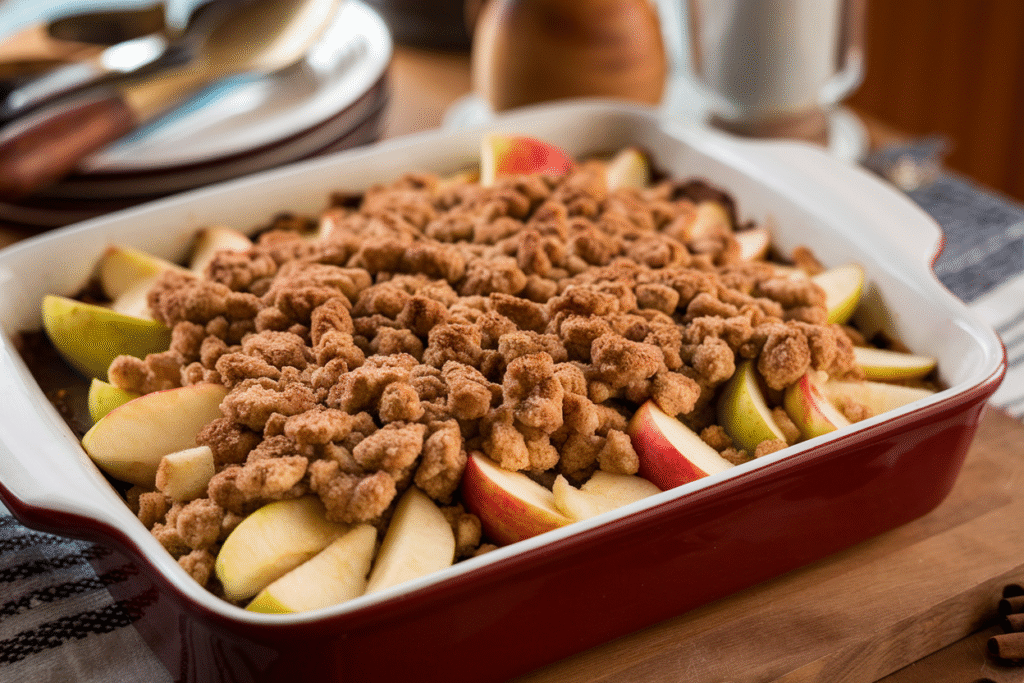
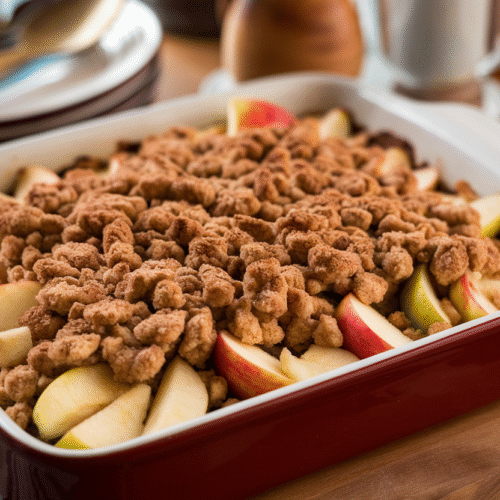
You know that dessert you swear you’ll “just have a bite of,” and then suddenly the pan is missing an embarrassing amount? That’s this apple crisp. It’s fast, it’s simple, and it hits all the right notes: warm, buttery crumble, tart apples, and that golden, toasty top that crackles when you tap it with a spoon.
My grandmother baked this for crowds without breaking a sweat—and yes, it’s 100% gluten-free without tasting like a compromise. You want comfort with a side of “wow, you made this?” Here’s your new signature move.
The Secret Behind This Recipe
Grandma’s trick wasn’t fancy—just incredibly smart. She combined a mix of gluten-free oats with almond flour for a crumble that stays crisp, not gummy.
A little cornstarch in the apple filling keeps the juices glossy and thick, so you get syrupy, tender apples instead of a watery mess. Equally crucial: the apple blend. She used two varieties—one crisp and tart, one sweet and soft—so the texture and flavor stack.
Finally, she pre-toasted the oat mixture just a bit by rubbing in cold butter thoroughly, making drier crumbs that bake up into that coveted crunch.
Ingredients
- For the apple filling:
- 6 medium apples (3 tart like Granny Smith, 3 sweet like Honeycrisp or Fuji), peeled, cored, and sliced 1/4-inch thick
- 1/3 cup coconut sugar or light brown sugar
- 1 1/2 tablespoons fresh lemon juice
- 1 teaspoon vanilla extract
- 1 1/2 teaspoons ground cinnamon
- 1/4 teaspoon ground nutmeg
- 1/8 teaspoon ground cloves (optional)
- 2 tablespoons cornstarch (or arrowroot starch)
- Pinch of fine sea salt
- For the crisp topping:
- 1 cup certified gluten-free rolled oats
- 3/4 cup almond flour (superfine if possible)
- 1/3 cup chopped pecans or walnuts (optional but recommended)
- 1/2 cup light brown sugar (or coconut sugar)
- 1/2 teaspoon ground cinnamon
- 1/4 teaspoon fine sea salt
- 7 tablespoons cold unsalted butter, cubed (or 7 tablespoons coconut oil, firm, for dairy-free)
- To serve:
- Vanilla ice cream, whipped cream, or coconut yogurt (optional, but come on)
The Method – Instructions
- Preheat and prep the pan: Heat oven to 350°F (175°C). Grease a 9-inch square or similar baking dish. No parchment—crisp edges need direct heat.
- Slice apples evenly: Peel and slice apples 1/4-inch thick.
Uniform slices = even baking and fewer soggy bits.
- Mix the filling: In a large bowl, toss apples with sugar, lemon juice, vanilla, cinnamon, nutmeg, cloves (if using), cornstarch, and a pinch of salt. Stir until every slice glistens. Pour into the baking dish and spread evenly.
- Build the topping: In another bowl, combine oats, almond flour, nuts, brown sugar, cinnamon, and salt.
Add cold butter. Using your fingers or a pastry cutter, work the butter in until you have pea-sized crumbles. Cold butter is non-negotiable for that crisp top.
- Top it like you mean it: Scatter the crumble evenly over the apples. Don’t pack it down—airy pockets help with crunch.
- Bake: Bake for 40–50 minutes until the topping is deep golden and the apple juices are bubbling around the edges.
If the top browns too fast, tent loosely with foil for the last 10 minutes.
- Rest (yes, really): Let it cool 15–20 minutes. The juices thicken as it rests. This is where patience becomes flavor.
- Serve with something creamy: Ice cream if you’re feeling classic, coconut yogurt if dairy-free.
Or both—no judgment.
Storage Tips
- Room temperature: Keep covered for up to 24 hours. The topping stays fairly crisp; it’s cozy and snackable.
- Refrigerator: Store up to 4 days, covered. Reheat at 350°F (175°C) for 10–12 minutes to re-crisp the top.
Microwave works in a pinch, but the crunch will cry a little.
- Freezer: Freeze baked crisp, tightly wrapped, for up to 2 months. Reheat from frozen at 350°F (175°C) for 25–35 minutes until hot and bubbly.
- Make-ahead: Assemble filling and topping separately and refrigerate up to 24 hours. Top and bake when ready.
Why This is Good for You
- Apples bring fiber and antioxidants like quercetin and vitamin C, supporting gut health and immunity.
- Almond flour adds healthy fats and protein, making this dessert more satisfying and less of a sugar rollercoaster.
- Oats (certified gluten-free) provide beta-glucan fiber, which can support heart health—yes, dessert doing cardio.
- Reasonable sweetness: The sugar complements the fruit instead of bulldozing it.
You taste apple, not candy.
Pitfalls to Watch Out For
- Using only one apple variety: You’ll miss that contrast of tart and sweet. Blend two types for best texture and flavor.
- Warm butter in the topping: Melted butter = soggy crumble. Keep it cold and crumbly.
- Skipping starch in the filling: No thickener means watery crisp.
That’s not the legacy we’re going for, IMO.
- Overcrowding slices: Apple slices that are too thick or packed tightly can stay firm. Keep them even and spread out.
- Underbaking: Wait for bubbly edges and deep golden brown. Pale topping equals sadness.
Alternatives
- Dairy-free: Use firm coconut oil or vegan butter in the topping.
Add a pinch more salt to mimic butter richness.
- No nuts: Swap almond flour for a 1:1 gluten-free flour blend and omit nuts. Add 1–2 tablespoons shredded coconut for texture.
- Lower sugar: Reduce sugar in both filling and topping by 25–30%. Use extra-tart apples to keep flavor vivid.
- Spice switch-up: Try cardamom instead of nutmeg, or add 1 teaspoon grated fresh ginger for a warm kick.
- Apple-adjacent: Mix in 1 cup berries or pears.
If using juicy berries, add an extra teaspoon of cornstarch.
- Oat-free version: Use 1 1/4 cups almond flour + 1/2 cup chopped nuts or seeds in place of oats. Crunch factor preserved.
FAQ
Can I use quick oats instead of rolled oats?
Yes, but the texture will be finer and a bit less chunky. If using quick oats, reduce the almond flour by a tablespoon to keep the topping from getting too sandy.
Do I have to peel the apples?
Nope.
If you like a rustic vibe and extra fiber, leave the peels on. Just slice thinner so the skins soften properly.
What if I only have one type of apple?
It’ll still be good. If it’s a sweet variety, add an extra teaspoon of lemon juice; if it’s a tart variety, bump the sugar by a tablespoon.
Can I make this in a cast-iron skillet?
Absolutely.
A 10-inch skillet works great and helps crisp the edges. Preheat the skillet in the oven for 5 minutes before adding the filling for extra sizzle.
How do I keep the topping from getting soggy the next day?
Reheat in the oven, not the microwave. A quick 10–12 minutes at 350°F (175°C) brings back the crunch.
You can also broil for 1–2 minutes at the end—watch closely.
Is this celiac-safe?
Use certified gluten-free oats and check all labels (starch, vanilla, etc.) for cross-contamination. If in doubt, choose brands that explicitly state gluten-free processing.
Can I cut the butter further?
You can go down to 5–6 tablespoons, but the crisp will be lighter and less cohesive. For a healthier tweak without sacrifice, keep the fat and reduce the sugar slightly instead.
In Conclusion
This is the kind of dessert that makes people nostalgic for a childhood they didn’t even have.
It’s simple, fast, and built on smart technique: cold butter, mixed apples, and the right starch. The result? A golden, gluten-free apple crisp that’s crunchy on top, silky in the middle, and wildly repeatable.
Serve it warm, accept the compliments, and—FYI—double the recipe if you like leftovers. You won’t have any.
Apple Crisp
Ingredients
For the apple filling
- 6 medium medium apples (3 tart like Granny Smith, 3 sweet like Honeycrisp or Fuji), peeled, cored, and sliced 1/4-inch thick
- 1/3 cup coconut sugar or light brown sugar
- 1.5 tablespoons fresh lemon juice
- 1 teaspoon vanilla extract
- 1.5 teaspoons ground cinnamon
- 1/4 teaspoon ground nutmeg
- 1/8 teaspoon ground cloves (optional) Optional for enhancing flavor.
- 2 tablespoons cornstarch (or arrowroot starch)
- 1 pinch fine sea salt
For the crisp topping
- 1 cup certified gluten-free rolled oats
- 3/4 cup almond flour (superfine if possible)
- 1/3 cup chopped pecans or walnuts (optional but recommended) Optional for added crunch.
- 1/2 cup light brown sugar (or coconut sugar)
- 1/2 teaspoon ground cinnamon
- 1/4 teaspoon fine sea salt
- 7 tablespoons cold unsalted butter, cubed (or 7 tablespoons coconut oil, firm, for dairy-free) Keep cold for a crispy topping.
To serve
- Vanilla ice cream, whipped cream, or coconut yogurt (optional, but come on) Great for serving.
Instructions
Preparation
- Preheat oven to 350°F (175°C) and grease a 9-inch square baking dish.
- Peel and slice apples 1/4-inch thick to ensure even baking.
Mixing the filling
- In a large bowl, toss apples with coconut sugar, lemon juice, vanilla, cinnamon, nutmeg, cloves (if using), cornstarch, and a pinch of salt until well combined.
- Pour apple mixture into the greased baking dish and spread evenly.
Making the topping
- In another bowl, combine oats, almond flour, nuts, brown sugar, cinnamon, and salt.
- Add cold butter and mix using fingers or a pastry cutter until pea-sized crumbles form.
Baking
- Scatter the crumble topping evenly over the apples without packing it down.
- Bake for 40–50 minutes until the topping is golden and juices are bubbling.
- If the topping browns too quickly, tent loosely with foil for the last 10 minutes.
Serving
- Let it cool for 15–20 minutes to thicken the juices, then serve with ice cream or coconut yogurt.
Notes
Printable Recipe Card
Want just the essential recipe details without scrolling through the article? Get our printable recipe card with just the ingredients and instructions.