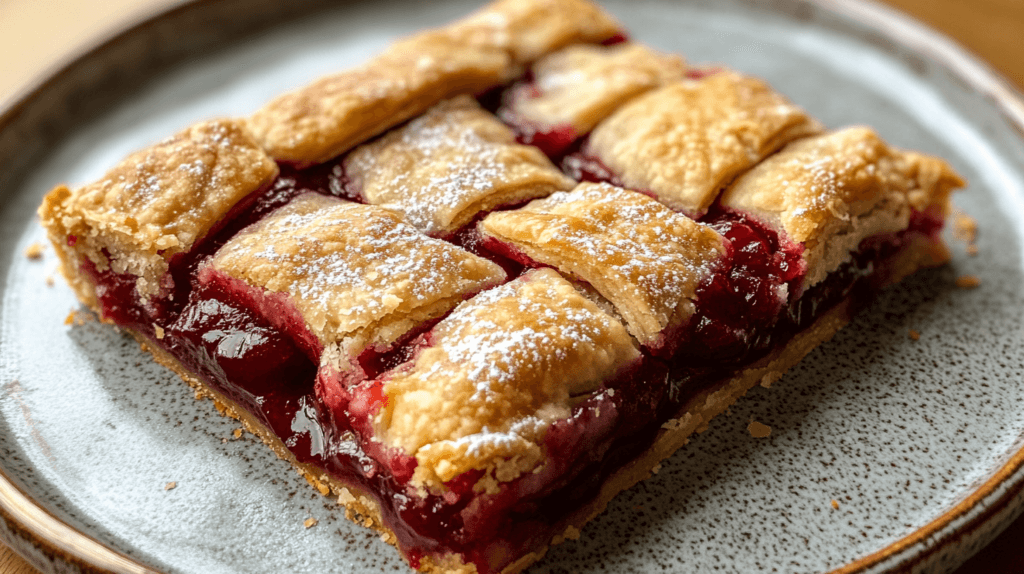
Cherry pie bars are the perfect combination of a classic cherry pie and a delicious, easy-to-make dessert bar. These sweet treats feature a buttery crust, a luscious cherry filling, and a crumbly topping, often finished with a light glaze for extra sweetness. Unlike traditional cherry pies that require careful rolling of pie dough, cherry pie bars offer a more convenient way to enjoy the same great flavors with less effort.
Whether you’re making them for a summer picnic, a holiday gathering, or simply as a treat for yourself, cherry pie bars are always a crowd-pleaser. In this guide, we’ll explore everything you need to know about making cherry pie bars, from the ingredients to step-by-step instructions, variations, storage tips, and more.
Let’s dive into the delicious world of cherry pie bars!
Table of Contents
What Are Cherry Pie Bars?
Cherry pie bars are a dessert that takes all the flavors of a classic cherry pie and transforms them into a more portable, sliceable bar form. They consist of three main components:
- A buttery, shortbread-like crust that serves as the base.
- A sweet and tangy cherry filling made from fresh, frozen, or canned cherries.
- A crumbly topping that adds texture and extra flavor.
Many recipes also include a vanilla or almond glaze drizzled over the top for extra sweetness and a polished look.
These bars are perfect for potlucks, bake sales, and family gatherings because they are easy to make, slice, and serve.
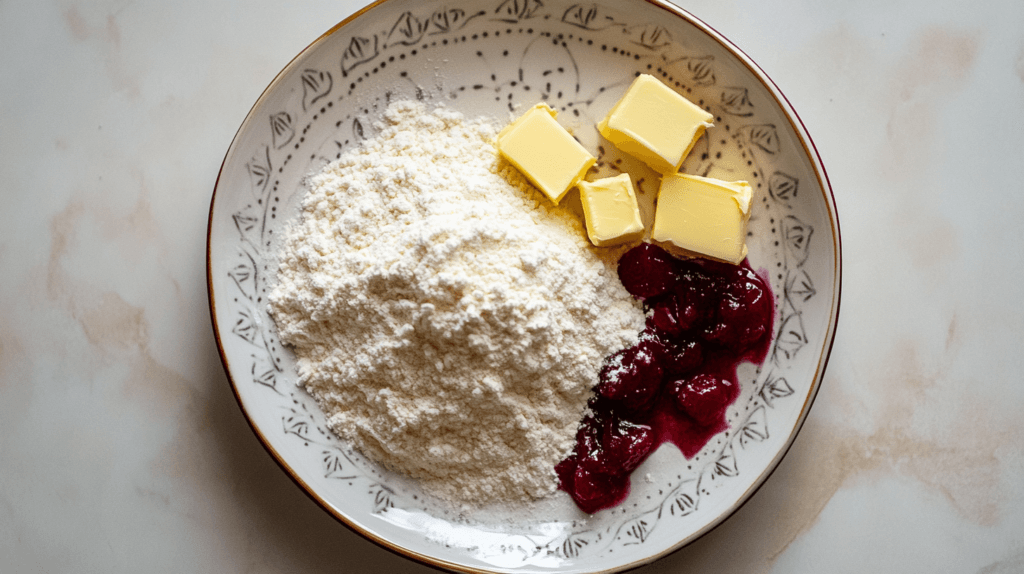
Ingredients for Cherry Pie Bars
To make the perfect cherry pie bars, you’ll need a few basic ingredients. Here’s what you’ll need:
For the Crust and Topping:
✔ 2 ½ cups all-purpose flour
✔ 1 cup unsalted butter, softened
✔ ¾ cup granulated sugar
✔ ½ teaspoon salt
✔ 1 teaspoon vanilla extract
For the Cherry Filling:
✔ 1 (21 oz) can of cherry pie filling (or 2 cups homemade cherry filling)
✔ 1 teaspoon almond extract (optional, but adds great flavor)
For the Glaze:
✔ 1 cup powdered sugar
✔ 2 tablespoons milk
✔ ½ teaspoon vanilla or almond extract
These simple ingredients come together to create a dessert that is both sweet and buttery, with the perfect balance of tartness from the cherries.
How to Make Cherry Pie Bars
Now that we have our ingredients ready, let’s go through the step-by-step process of making delicious cherry pie bars.
Preparing the Crust
1️⃣ Preheat the Oven – Set your oven to 350°F (175°C) and line a 9×13-inch baking pan with parchment paper or grease it lightly with butter.
2️⃣ Mix the Ingredients – In a large mixing bowl, beat the butter and sugar together until light and fluffy. Then, add in the vanilla extract and salt, mixing well.
3️⃣ Incorporate the Flour – Slowly add the flour, mixing until a dough forms. The dough will be slightly crumbly but should hold together when pressed.
4️⃣ Press the Dough – Take about ⅔ of the dough and press it evenly into the bottom of your prepared baking pan. This will be your crust.
5️⃣ Bake the Crust – Place the pan in the oven and bake for 12-15 minutes, or until the edges turn slightly golden. Remove from the oven and let it cool slightly while you prepare the cherry filling.
Making the Cherry Filling
If using canned cherry pie filling, simply stir in almond extract (optional) to enhance the flavor.
If making homemade cherry filling, follow these steps:
✔ In a saucepan over medium heat, combine 2 cups of fresh or frozen cherries, ⅓ cup of sugar, 1 tablespoon cornstarch, and 1 tablespoon lemon juice.
✔ Stir continuously until the mixture thickens (about 5-7 minutes).
✔ Remove from heat and let it cool slightly.
Assembling the Layers
1️⃣ Spread the Cherry Filling – Evenly spread the cherry filling over the baked crust.
2️⃣ Crumble the Remaining Dough – Take the reserved ⅓ of the dough and crumble it over the cherry layer, creating a streusel-like topping.
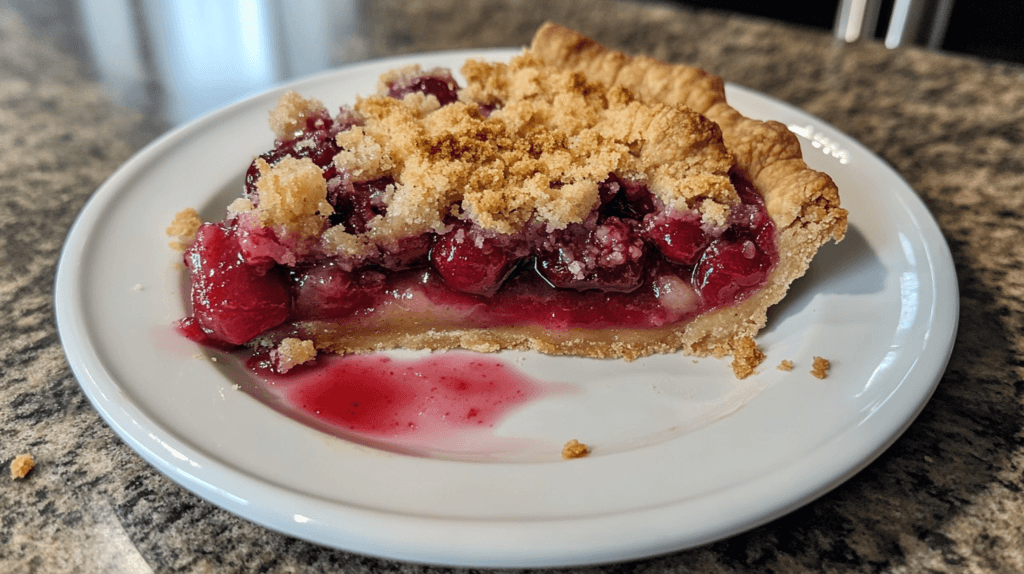
Baking and Cooling
1️⃣ Bake Again – Return the pan to the oven and bake for 30-35 minutes, or until the top is golden brown and the cherry filling is bubbling.
2️⃣ Cool Completely – Let the cherry pie bars cool in the pan for at least 1 hour before slicing. This allows the layers to set properly.
Glaze and Toppings for Cherry Pie Bars
A simple glaze adds extra sweetness and makes these bars even more irresistible!
How to Make the Glaze:
✔ In a small bowl, whisk together 1 cup powdered sugar, 2 tablespoons milk, and ½ teaspoon vanilla or almond extract until smooth.
✔ Drizzle the glaze over the cooled cherry pie bars.
🍒 Optional Toppings:
- Sprinkle with slivered almonds for a crunchy texture.
- Dust with powdered sugar for a bakery-style look.
- Serve with a scoop of vanilla ice cream for an extra treat.
Variations of Cherry Pie Bars
While classic cherry pie bars are already delicious, you can easily customize them to suit your preferences. Here are some fun variations to try:
1. Mixed Berry Pie Bars
- Replace cherry pie filling with a combination of blueberries, raspberries, and blackberries for a mixed berry twist.
- Add a teaspoon of lemon zest to enhance the fruity flavors.
2. Chocolate Cherry Pie Bars
- Stir in ½ cup of chocolate chips into the crust for a chocolaty base.
- Drizzle melted dark chocolate over the cooled bars instead of a sugar glaze.
3. Almond Cherry Pie Bars
- Add ½ teaspoon of almond extract to both the crust and glaze for a nutty flavor.
- Sprinkle sliced almonds on top before baking for a crunchy texture.
4. Cheesecake Cherry Pie Bars
- Mix 4 oz of cream cheese, ¼ cup sugar, and 1 egg to create a cheesecake layer between the crust and cherry filling.
- Bake as usual, but allow extra time for the cheesecake layer to set properly.
5. Gluten-Free Cherry Pie Bars
- Substitute all-purpose flour with a gluten-free flour blend.
- Ensure your cherry pie filling is gluten-free if using store-bought.
These variations allow you to experiment with flavors and textures while keeping the same easy-to-make format!
Serving and Storage Tips
To fully enjoy the delicious flavors of cherry pie bars, proper serving and storage are essential. Here’s how to keep them fresh and tasting amazing.
How to Serve Cherry Pie Bars
Cherry pie bars taste best when served at room temperature or slightly warm. Here are some serving ideas to enhance their flavor:
🍒 Classic Serving – Simply slice the bars and serve as they are for a sweet, fruity dessert.
🍒 With Ice Cream – Pair with a scoop of vanilla, almond, or cherry ice cream for an indulgent treat.
🍒 With Whipped Cream – A dollop of homemade whipped cream adds a light, airy contrast.
🍒 With Coffee or Tea – These bars pair perfectly with a cup of coffee, black tea, or herbal tea.
🍒 With Chocolate Drizzle – Melt some dark or white chocolate and drizzle it over the bars for an extra layer of decadence.
🍒 With Fresh Fruit – Serve with fresh strawberries, blueberries, or extra cherries for a refreshing twist.
How to Store Cherry Pie Bars
Proper storage keeps your cherry pie bars fresh and prevents them from becoming soggy or dry.
At Room Temperature
- If you plan to eat them within 1-2 days, store them in an airtight container at room temperature.
- Keep them in a cool, dry place, away from direct sunlight or heat.
In the Refrigerator
- If storing for longer than 2 days, place the bars in an airtight container and refrigerate.
- They will stay fresh for up to 5 days.
- To prevent them from drying out, layer them with parchment paper if stacking.
In the Freezer
Cherry pie bars freeze well, making them great for meal prep or saving leftovers.
How to freeze:
✔ Allow the bars to cool completely before freezing.
✔ Wrap individual bars in plastic wrap or foil to prevent freezer burn.
✔ Place wrapped bars in a freezer-safe bag or airtight container.
✔ Label the container with the date to track freshness.
How to thaw and reheat:
✔ Let frozen bars thaw at room temperature for about 30 minutes before serving.
✔ For warm bars, heat in the microwave for 10-15 seconds or in the oven at 300°F (150°C) for 5 minutes.
Healthier Alternatives for Cherry Pie Bars
If you love cherry pie bars but want to make them healthier, there are several easy ingredient swaps and adjustments you can make without sacrificing taste.
1. Healthier Crust Alternatives
Instead of the traditional butter-based crust, try:
✔ Whole wheat flour instead of all-purpose flour for added fiber.
✔ Oat flour or almond flour for a gluten-free and nutrient-rich option.
✔ Coconut oil or Greek yogurt instead of butter for a lower-fat crust.
2. Lower Sugar Options
Cherry pie bars can be quite sweet, but here’s how to cut down on sugar:
✔ Reduce the sugar in the crust by ¼ cup.
✔ Use unsweetened cherry pie filling or make a homemade filling with less sugar.
✔ Replace granulated sugar with honey, maple syrup, or coconut sugar for natural sweetness.
3. Healthier Toppings & Glaze
Instead of a traditional powdered sugar glaze, try:
✔ Greek yogurt drizzle mixed with a little honey.
✔ Dark chocolate drizzle for added antioxidants.
✔ Chopped nuts or seeds for extra crunch and healthy fats.
4. More Nutrient-Packed Additions
✔ Add ground flaxseeds or chia seeds to the crust for extra fiber.
✔ Mix in chopped nuts (like walnuts or almonds) for added protein.
✔ Use fresh cherries instead of canned to reduce added sugar.
These small changes make cherry pie bars a healthier dessert while still keeping them delicious!
Common Mistakes to Avoid
Even though cherry pie bars are relatively easy to make, small mistakes can impact their texture, flavor, or appearance. Here’s how to avoid common baking issues:
1. Skipping the Pre-Baking of the Crust
❌ If you don’t pre-bake the crust, it may turn out soft or soggy instead of firm and buttery.
✅ Solution: Bake the crust for 12-15 minutes before adding the cherry filling.
2. Using Too Much or Too Little Filling
❌ Adding too much cherry filling can make the bars too gooey, while too little can make them dry and crumbly.
✅ Solution: Use about 2 cups of cherry filling for the perfect balance of crust and filling.
3. Overbaking the Bars
❌ Baking for too long will make the crust hard and dry.
✅ Solution: Bake just until the top is golden brown and the filling is bubbly (about 30-35 minutes).
4. Not Letting the Bars Cool Before Cutting
❌ Cutting too soon will result in messy, crumbling bars that don’t hold their shape.
✅ Solution: Allow the bars to cool for at least 1 hour before slicing.
5. Not Lining the Pan Properly
❌ If you don’t grease the pan or use parchment paper, the bars may stick to the pan.
✅ Solution: Line the baking dish with parchment paper, leaving overhang on the sides for easy removal.
6. Using the Wrong Flour
❌ Swapping all-purpose flour with alternative flours (like almond or coconut) without adjustments can lead to a crumbly or dense texture.
✅ Solution: If using alternative flours, adjust liquid and fat content to maintain the right texture.
By following these tips, you’ll ensure your cherry pie bars come out perfect every time!
FAQs about Cherry Pie Bars
1. Can I use fresh cherries instead of canned filling?
Yes! Simply cook fresh cherries with sugar, cornstarch, and lemon juice to make a homemade cherry filling. If you love experimenting with fruit-based desserts, you might also enjoy this Peach Crumble Recipe for another fruity delight.
2. How do I keep the bars from crumbling?
Allow them to cool completely before cutting. This helps the layers set and hold together. If you love the idea of a firm yet chewy dessert, check out these Rice Krispie Chocolate Chip Cookies for a crispy twist.
3. Can I make cherry pie bars ahead of time?
Absolutely! You can bake them a day ahead and store them in the fridge until ready to serve. They pair well with other easy-to-make treats like Pecan Pie Bars, which are also great for prepping in advance.
4. Do I have to use almond extract?
No, but it enhances the cherry flavor. You can substitute it with vanilla extract if preferred.
5. Can I freeze cherry pie bars?
Yes! Wrap them tightly and freeze for up to 3 months. Thaw at room temperature before serving.
6. What’s the best way to cut cherry pie bars?
Use a sharp knife and wipe it clean between cuts for neat slices.
Conclusion
Cherry pie bars are a delightful twist on traditional cherry pie, offering a buttery crust, a sweet cherry filling, and a crumbly topping—all in an easy-to-make bar form. They are perfect for any occasion, from casual get-togethers to holiday desserts.
With various ways to customize the recipe and simple storage options, you can make cherry pie bars anytime you crave a fruity, sweet treat. Try them today and enjoy a slice of cherry-filled goodness! 🍒✨
Printable Recipe Card
Want just the essential recipe details without scrolling through the article? Get our printable recipe card with just the ingredients and instructions.